Security Reactive อย่างลึกด้วย Spring Security WebFlux
เวลาอ่าน ≈ 20 นาที — คู่มือเชิงลึกสำหรับตั้งค่าความปลอดภัย Reactive บน Spring Security WebFlux ครบทุกเรื่องตั้งแต่ Authentication-WebFilter, SecurityWebFilterChain, JWT, OAuth2 Login, ไปจนถึง Reactive AuthorizationManager และการทดสอบ
สารบัญ
- Reactive Security ทำไมถึงต่าง?
- โครงสร้าง SecurityWebFilterChain
- AuthenticationWebFilter & ReactiveAuthenticationManager
- JWT กับ Reactive Authentication
- Reactive OAuth2 Login Flow
- Reactive AuthorizationManager
- บริหาร ReactiveSecurityContextHolder
- CSRF & CORS ใน WebFlux
- การทดสอบ Security ด้วย WebTestClient
- Best Practice & Checklist
1. Reactive Security ทำไมถึงต่าง?
บน Stack Servlet (Spring MVC) Spring Security ทำงานผ่าน javax.servlet.Filter หลายตัว. แต่ WebFlux รันบน Netty event-loop และใช้ org.springframework.web.server.WebFilter ที่เป็น non-blocking. ทุกส่วนจึงต้องคืนค่า Mono/Flux เพื่อหลีกเลี่ยงการบล็อก Thread
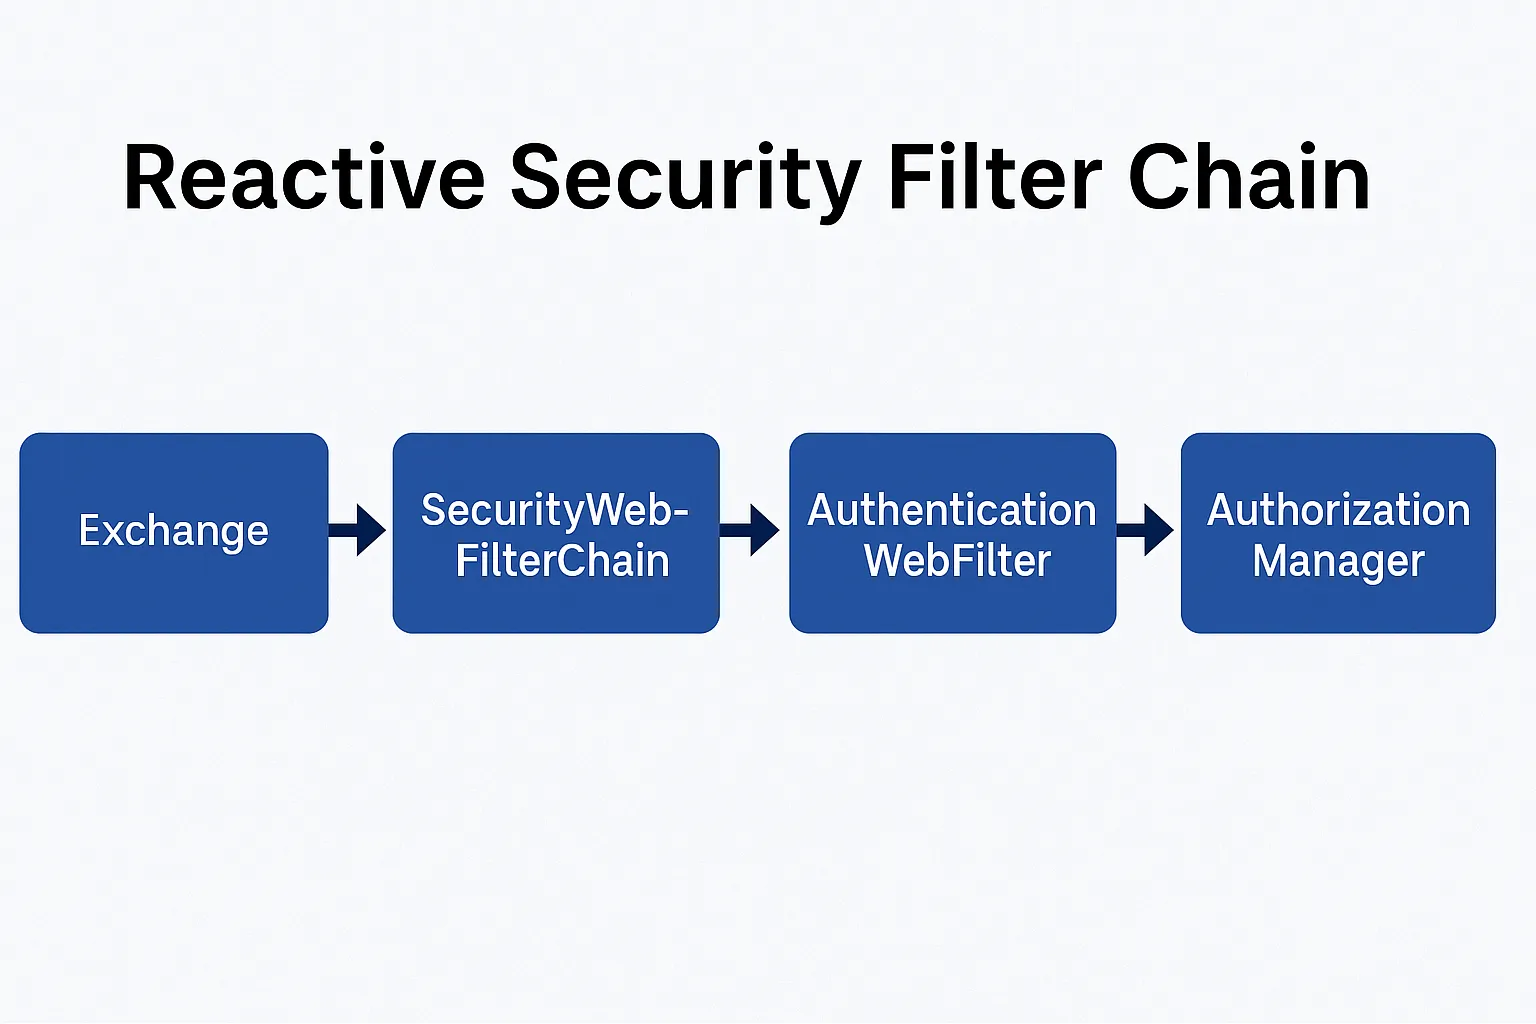
2. โครงสร้าง SecurityWebFilterChain
@Bean
public SecurityWebFilterChain springSecurityFilterChain(ServerHttpSecurity http) {
    return http
        .csrf(csrf -> csrf.disable())
        .authorizeExchange(ex -> ex
            .pathMatchers("/public/**").permitAll()
            .anyExchange().authenticated())
        .authenticationManager(reactiveAuthManager())
        .securityContextRepository(securityContextRepo())
        .build();
}
SecurityWebFilterChain– ประกอบ WebFilter ตาม configAuthenticationWebFilter– รับ Credential สร้างAuthenticationAuthorizationWebFilter– ใช้ReactiveAuthorizationManagerตรวจสิทธิ์
3. AuthenticationWebFilter & ReactiveAuthenticationManager
3.1 กำหนดวิธีอ่าน Credentials
@Bean
public AuthenticationWebFilter authenticationWebFilter() {
    AuthenticationWebFilter filter =
        new AuthenticationWebFilter(reactiveAuthManager());

    filter.setServerAuthenticationConverter(exchange -> {
        return Mono.zip(
                exchange.getRequest().getHeaders().getFirst("X-USER"),
                exchange.getRequest().getHeaders().getFirst("X-PASS"))
            .map(tuple -> new UsernamePasswordAuthenticationToken(tuple.getT1(),
                                                                  tuple.getT2()));
    });
    return filter;
}
3.2 ReactiveAuthenticationManager
@Bean
public ReactiveAuthenticationManager reactiveAuthManager(UserDetailsService svc,
                                                         PasswordEncoder pwd) {
    UserDetailsRepositoryReactiveAuthenticationManager mgr =
        new UserDetailsRepositoryReactiveAuthenticationManager(svc);
    mgr.setPasswordEncoder(pwd);
    return mgr;
}
4. JWT กับ Reactive Authentication
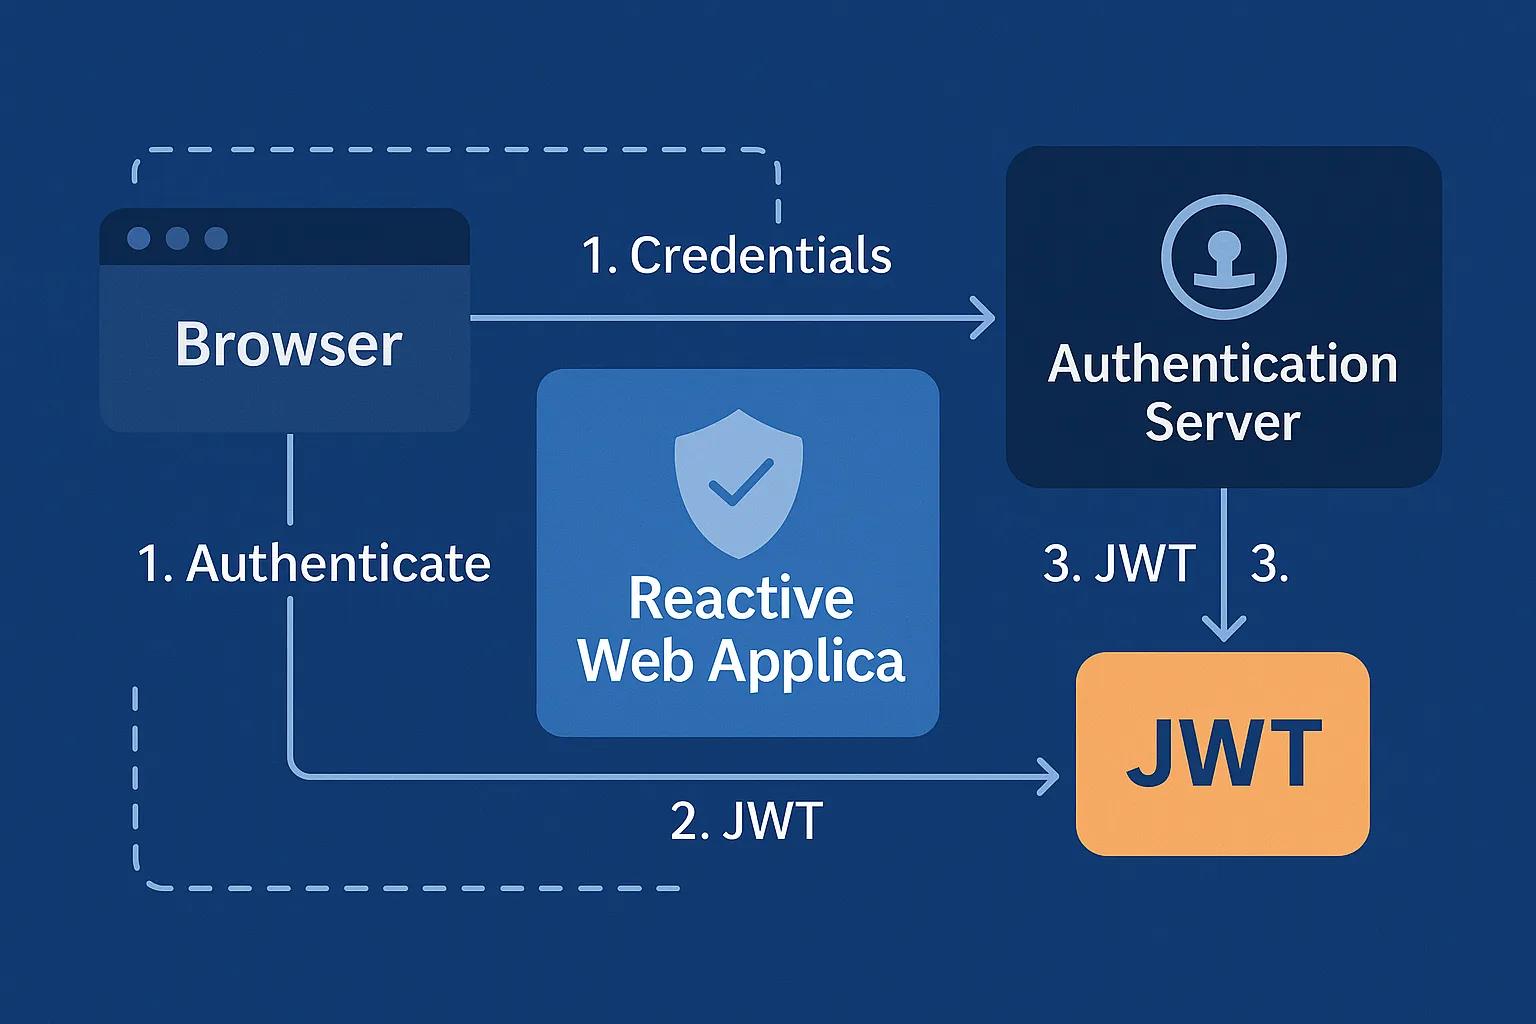
4.1 สร้าง JWT TokenFilter
public class JwtAuthWebFilter implements WebFilter {

  private final JwtDecoder decoder;

  public JwtAuthWebFilter(JwtDecoder decoder) { this.decoder = decoder; }

  @Override
  public Mono<Void> filter(ServerWebExchange exchange, WebFilterChain chain) {
      return Mono.justOrEmpty(exchange.getRequest().getHeaders().getFirst(HttpHeaders.AUTHORIZATION))
          .filter(h -> h.startsWith("Bearer "))
          .map(h -> h.substring(7))
          .flatMap(decoder::decode)
          .map(jwt -> new UsernamePasswordAuthenticationToken(
                           jwt.getSubject(), jwt, AuthorityUtils.NO_AUTHORITIES))
          .flatMap(auth -> chain.filter(exchange)
                                .contextWrite(withSecurityContext(auth)))
          .switchIfEmpty(chain.filter(exchange));
  }

  private Context withSecurityContext(Authentication auth) {
      return ReactiveSecurityContextHolder.withAuthentication(auth);
  }
}
4.2 ผูก Filter เข้า Chain
http.addFilterAt(new JwtAuthWebFilter(jwtDecoder), SecurityWebFiltersOrder.AUTHENTICATION);
5. Reactive OAuth2 Login Flow
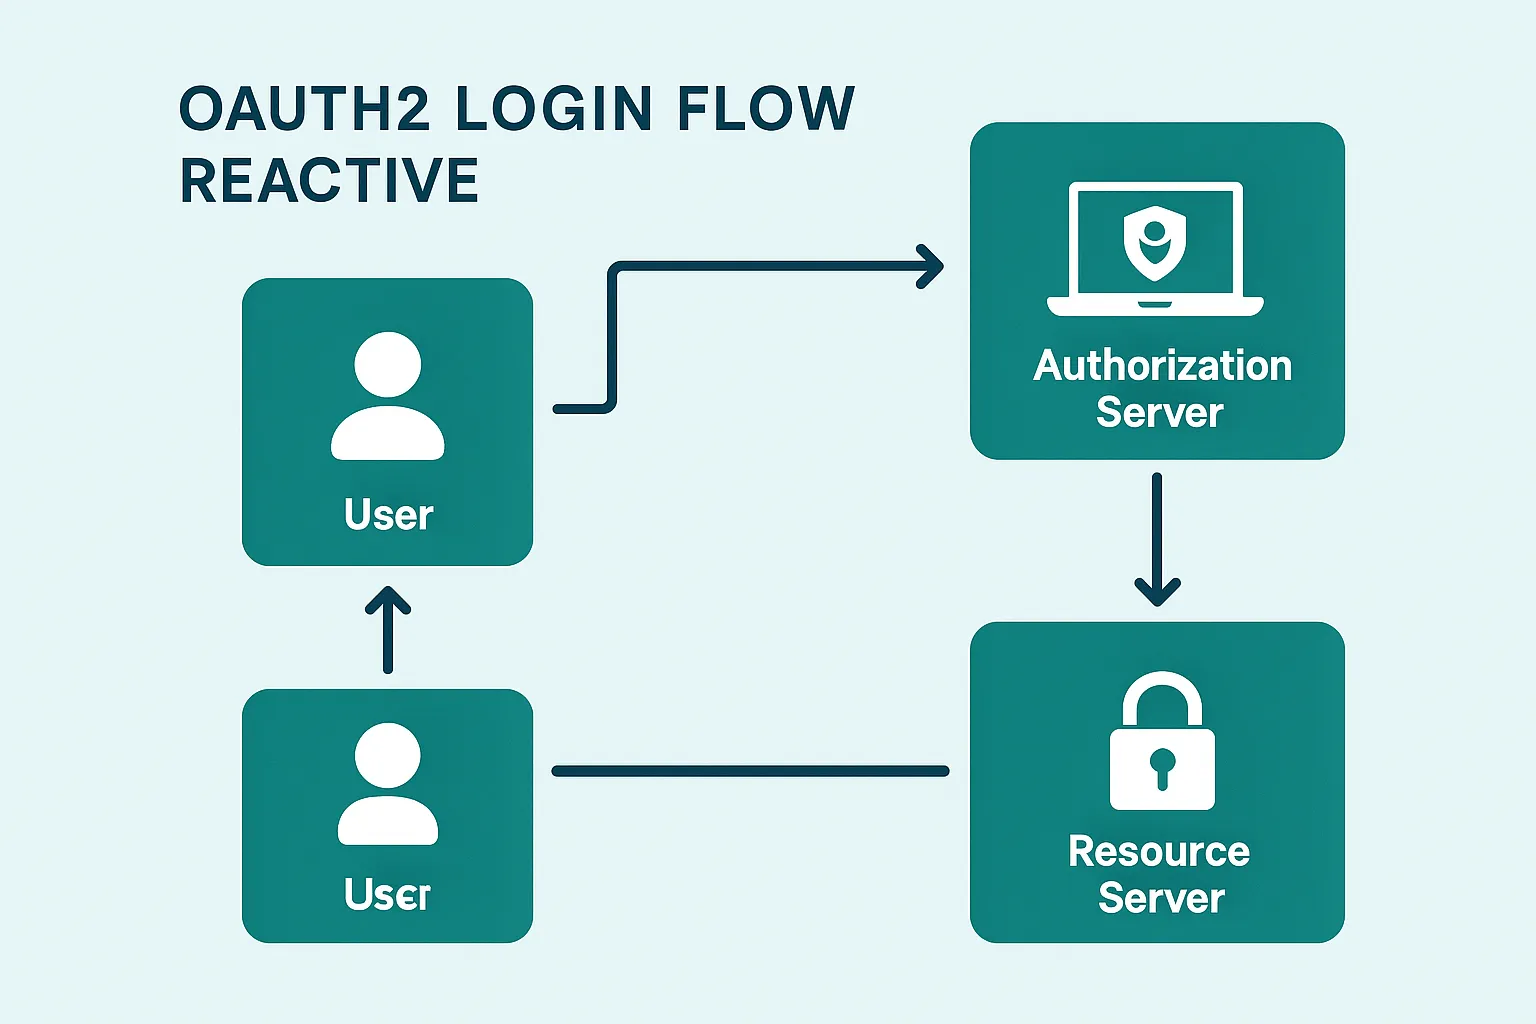
@Bean
public SecurityWebFilterChain oauth2LoginChain(ServerHttpSecurity http) {
    return http
      .authorizeExchange(ex -> ex.anyExchange().authenticated())
      .oauth2Login(oauth2 -> oauth2.loginPage("/oauth2/authorization/github"))
      .oauth2Client(Customizer.withDefaults())
      .build();
}
6. Reactive AuthorizationManager
@Bean
public SecurityWebFilterChain chain(ServerHttpSecurity http) {
    return http
      .authorizeExchange(ex -> ex
          .pathMatchers(HttpMethod.POST, "/admin/**")
          .access((mono, ctx) -> mono
              .map(Authentication::getAuthorities)
              .flatMapMany(Flux::fromIterable)
              .any(a -> a.getAuthority().equals("ROLE_ADMIN"))
              .map(AuthorizationDecision::new))
          .anyExchange().permitAll())
      .build();
}
7. บริหาร ReactiveSecurityContextHolder
- ใช้
.contextWrite(ReactiveSecurityContextHolder.withAuthentication(auth)) - ในการสลับ Scheduler (เช่น
publishOn) ค่าContextจะไหลไปด้วย - เปิด
DelegatingSecurityContextReactiveOperatorใน lib spring-security-core สำหรับงาน Batch
8. CSRF & CORS ใน WebFlux
http
  .csrf(csrf -> csrf
      .csrfTokenRepository(CookieServerCsrfTokenRepository.withHttpOnlyFalse()))
  .cors(cors -> cors.configurationSource(exchange -> {
        CorsConfiguration cfg = new CorsConfiguration();
        cfg.addAllowedOrigin("https://example.com");
        cfg.addAllowedMethod("*");
        cfg.setAllowCredentials(true);
        return cfg;
  }));
9. การทดสอบ Security ด้วย WebTestClient
@Import(SecurityConfig.class)
@SpringBootTest(webEnvironment = WebEnvironment.RANDOM_PORT)
class JwtSecurityTest {

 @Autowired WebTestClient client;

 @Test
 void shouldRejectWhenNoToken() {
      client.get().uri("/protected")
            .exchange()
            .expectStatus().isUnauthorized();
 }

 @Test
 void shouldAllowWithValidToken() {
      String token = JwtUtil.generate("userA");
      client.get().uri("/protected")
            .header(HttpHeaders.AUTHORIZATION, "Bearer " + token)
            .exchange()
            .expectStatus().isOk();
 }
}
10. Best Practice & Checklist
- ทุก WebFilter ต้อง non-blocking 100% (ตรวจ BlockHound)
- ใช้
ServerSecurityContextRepositoryเก็บ/เรียก Auth เพื่อลด latency - ตั้งค่า
spring.security.oauth2.client.provider.*.user-name-attributeให้ตรง field - เปิด Micrometer metric:
spring.securityprefix ติดตาม auth error rate - ทดสอบ Load 2× ภาระงานจริง เพื่อจับ race condition ใน Reactive Context
สรุป
Spring Security WebFlux มอบเครื่องมือครบเครื่องสำหรับ Reactive Authentication, Authorization, และ Context Propagation. หากออกแบบ SecurityWebFilterChain, เลือก AuthenticationManager, และจัดการ ReactiveSecurityContextHolder อย่างถูกวิธี คุณจะได้ระบบที่ รวดเร็ว, ไม่บล็อก, และ ปลอดภัยระดับสากล รองรับทั้ง JWT, OAuth2, และ Custom Auth Provider ได้สบาย ๆ