Custom Operator ด้วย Reactor
เวลาอ่าน ≈ 20 นาที — บทความนี้เจาะลึกวิธีสร้าง Custom Operator ใน Project Reactor (Flux/Mono) เพื่อขยายความสามารถ และรีไซเคิล logic แบบประกอบได้ พร้อมโค้ดตัวอย่าง, รูปอธิบาย, Lifecycle, และแนวทางทดสอบ
สารบัญ
- แนวคิดเบื้องหลัง Operator
- ทางเลือกสร้าง Custom Operator
- สร้าง Operator ด้วย
lift - ใช้
transform/composeเมื่อต้องการ Reuse - Operator Lifecycle & Signal Chain
- จัดการ Context และ Backpressure
- ทดสอบ Operator ด้วย StepVerifier
- จูนประสิทธิภาพ & Troubleshooting
- Demo ครบวงจร
1. แนวคิดเบื้องหลัง Operator
Operator ใน Reactive Streams คือ ฟังก์ชันบริสุทธิ์ แปลง Publisher<X> เป็น Publisher<Y>. Reactor ให้ Operator กว่า 500 รายการ (map, flatMap, zip ฯลฯ). แต่หลายกรณีเราต้องการ behaviour เฉพาะ — เช่น caching, duplicate suppression, metric enrichment — จึงต้องสร้าง Custom Operator เอง
2. ทางเลือกสร้าง Custom Operator
lift— สร้าง Operator ระดับ Core (รับ/คืนSubscriber)transform— ห่อ logic เป็น Function ระดับ Publishercompose— เหมือนtransformแต่สร้าง stateful function ใหม่ทุก subscribe- Extension Method / Utility — สร้าง static เมธอด ที่เรียก chain ของ Operator มาตรฐาน
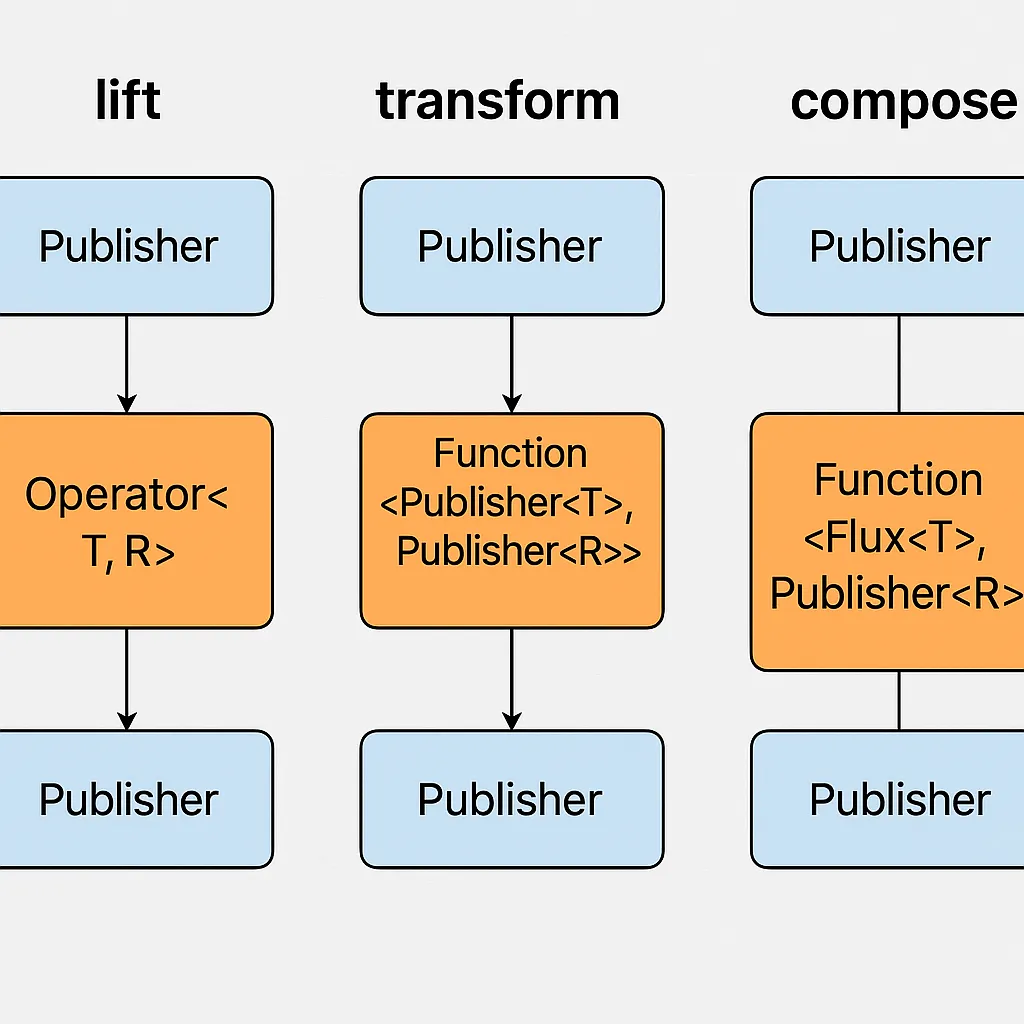
lift / transform / compose3. สร้าง Operator ด้วย lift
ตัวอย่าง: ทำ “delay first element until upstream count ≥ N”
public static <T> FluxOperator<T, T> delayUntilEmits(int n) {
    return source -> source.lift((sc, actual) -> new DelaySubscriber<>(actual, n));
}

static final class DelaySubscriber<T> implements CoreSubscriber<T> {

    final CoreSubscriber<? super T> actual;
    final int threshold;
    int count;

    DelaySubscriber(CoreSubscriber<? super T> actual, int threshold) {
        this.actual = actual;
        this.threshold = threshold;
    }

    @Override public void onSubscribe(Subscription s) { actual.onSubscribe(s); }

    @Override public void onNext(T t) {
        if (++count >= threshold) actual.onNext(t);
    }

    @Override public void onError(Throwable t) { actual.onError(t); }

    @Override public void onComplete() { actual.onComplete(); }
}
ใช้งาน:
Flux.range(1, 10)
    .transform(delayUntilEmits(3))
    .subscribe(System.out::println); // พิมพ์ 4..10
4. ใช้ transform และ compose
transform ถูกสร้างครั้งเดียว แชร์ระหว่าง Subscriber ทั้งหมด; compose สร้างใหม่ทุกครั้ง — ดังนั้นเหมาะกับการเก็บ state ภายใน
Function<Flux<Integer>, Publisher<Integer>> dedupe =
        f -> f.distinctUntilChanged();

Flux.range(1, 5)
    .repeat(2)
    .transform(dedupe)
    .subscribe(System.out::println);  // 1 2 3 4 5
5. Operator Lifecycle & Signal Chain
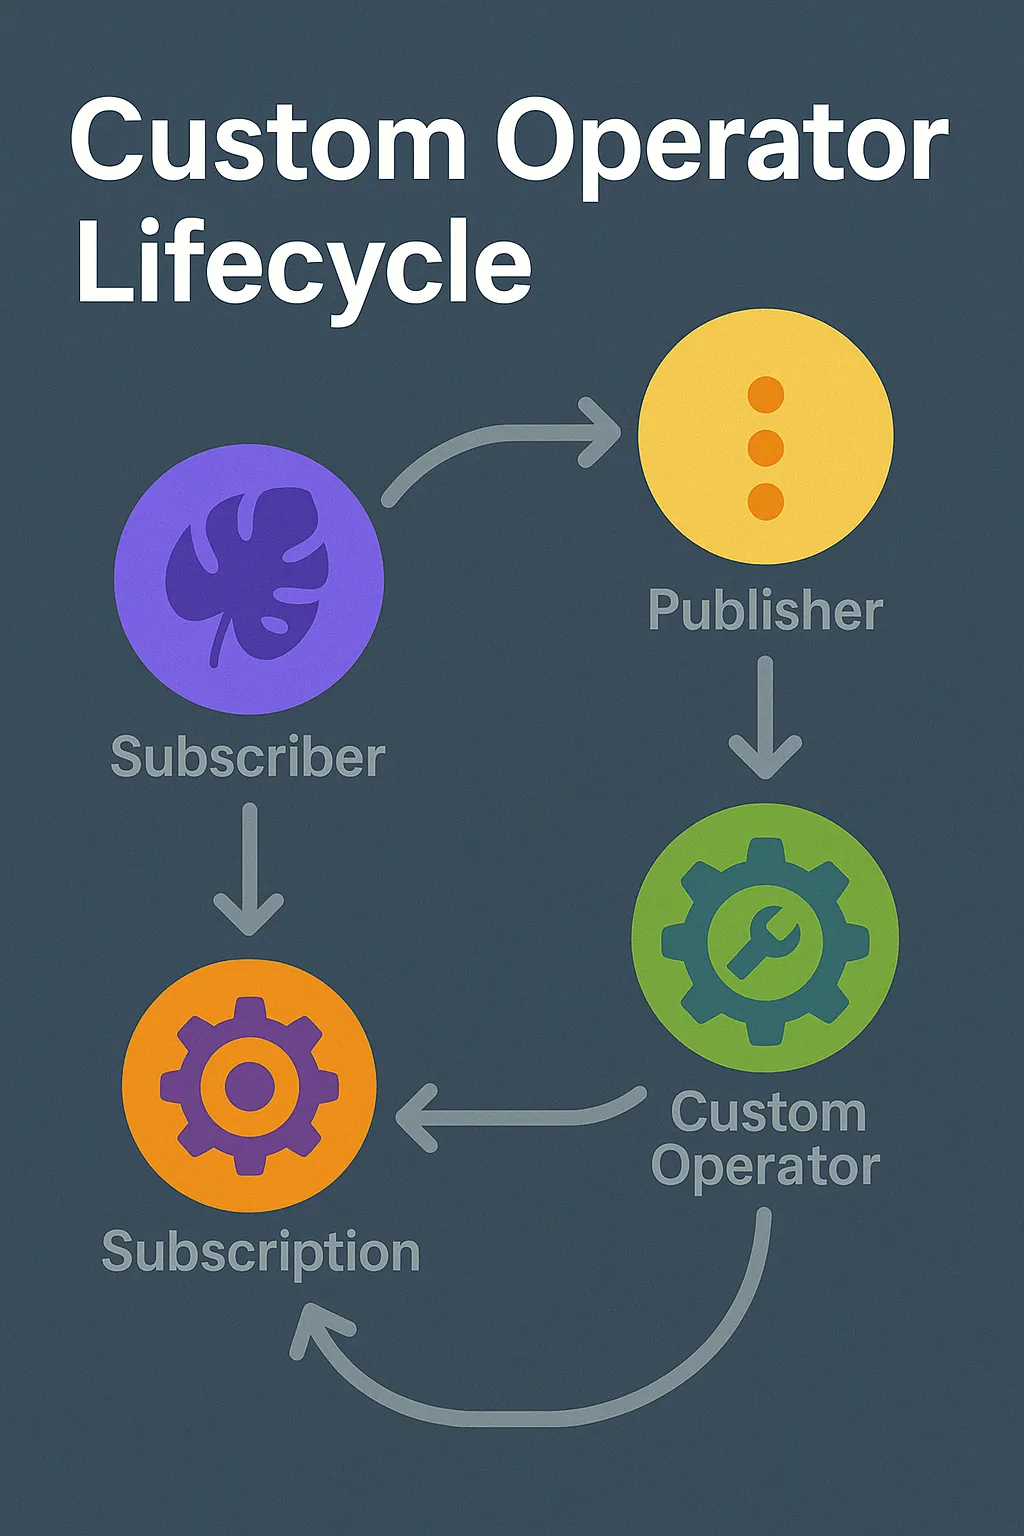
ทุก Operator ต้องปฏิบัติตามกฎ Reactive Streams:
- ส่ง
onSubscribeก่อนสัญญาณอื่น - เคารพ
request(n)เพื่อ Backpressure - ปล่อยสัญญาณ
onError/onCompleteอย่างเดียวและครั้งเดียว
6. จัดการ Context และ Backpressure
ถ้า Operator สร้าง inner Publisher (เช่น flatMap) ควร propagate Context:
Mono.deferContextual(ctx -> {
        String reqId = ctx.get("reqId");
        return source.map(v -> "[" + reqId + "]" + v);
}).contextWrite(Context.of("reqId", "123"));
ส่วน Backpressure — ใช้ BaseSubscriber หรือรักษา requested counter manual
7. ทดสอบ Operator ด้วย StepVerifier
@Test
void delayUntilEmits_shouldSkipFirstN() {
    StepVerifier.create(Flux.range(1, 5).transform(delayUntilEmits(2)))
                .expectNext(3, 4, 5)
                .verifyComplete();
}
ใช้ VirtualTimeScheduler หาก Operator เกี่ยวกับเวลา
8. จูนประสิทธิภาพ & Troubleshooting
- เปิด
Hooks.onOperatorDebug()แสดง assembly ก่อน deploy - ใช้
.log()หรือSignalLoggerเฉพาะจุดที่สงสัย - ห้ามบล็อก Thread ใน Operator; ส่งไป
Schedulers.boundedElastic() - วัด P99 latency ด้วย Micrometer + Grafana
9. Demo ครบวงจร
// Pipeline: custom delayFirst(3) + dedupe + window
Flux<Integer> demo =
        Flux.range(1, 20)
            .delayElements(Duration.ofMillis(50))
            .transform(delayUntilEmits(3))
            .compose(dedupe)
            .windowTimeout(5, Duration.ofSeconds(1))
            .flatMap(win -> win.collectList());

demo.subscribe(System.out::println);
Run demo แล้วสังเกตผลลัพธ์, Thread, และ Backpressure ผ่าน .log()
สรุป
การสร้าง Custom Operator ช่วยให้ Pipeline ของคุณ สั้น, อ่านง่าย, และ รีใช้ซ้ำ. เลือก lift เมื่อต้องการควบคุมระดับ Subscriber, ใช้ transform/compose สำหรับ Function re-use, และอย่าลืมทดสอบความถูกต้องด้วย StepVerifier ก่อนนำขึ้น Production