เมื่อพัฒนาแอปพลิเคชันด้วย Spring WebFlux ซึ่งทำงานแบบ Non-Blocking การตั้งค่าความปลอดภัยเบื้องต้นและการเปิด CORS (Cross-Origin Resource Sharing) เป็นสิ่งจำเป็นเพื่อป้องกันช่องโหว่และอนุญาตให้ Frontend คนละโดเมนเรียก API ได้อย่างปลอดภัย บทความนี้อธิบายหลักการ CORS Security พร้อมตัวอย่างโค้ดที่สามารถนำไปใช้งานจริง
1. ทำความเข้าใจ CORS
- CORS คือกลไกบน Browser ที่จำกัดการเรียก HTTP ข้ามโดเมน
- หาก Backend ไม่อนุญาต Origin ใด ๆ Browser จะบล็อกคำขอ
- WebFlux ต้องกำหนด Allowed-Origin, Allowed-Methods, Allowed-Headers
1.1 Global CORS ด้วย WebFluxConfigurer
@Configuration
public class CorsConfig implements WebFluxConfigurer {
  @Override
  public void addCorsMappings(CorsRegistry registry) {
    registry.addMapping("/**")
      .allowedOrigins("https://frontend.example.com")
      .allowedMethods("GET","POST","PUT","DELETE")
      .allowedHeaders("*")
      .allowCredentials(true)
      .maxAge(3600);
  }
}
1.2 CORS บน RouterFunction
RouterFunction<ServerResponse> route =
  RouterFunctions.route()
    .GET("/api/hello", req -> ServerResponse.ok().bodyValue("Hello"))
    .build()
    .filter(new CorsWebFilter(corsConfigurationSource));
2. เปิด Security เบื้องต้นใน WebFlux
spring-boot-starter-security จะเปิด Basic Auth อัตโนมัติ เราสามารถกำหนด SecurityWebFilterChain ให้ละเอียดขึ้นได้
2.1 เริ่มต้น Dependency Gradle
dependencies {
  implementation("org.springframework.boot:spring-boot-starter-security")
}
2.2 กำหนด SecurityWebFilterChain
@Configuration
@EnableWebFluxSecurity
public class SecurityConfig {

  @Bean
  public SecurityWebFilterChain springSecurity(ServerHttpSecurity http) {
    return http
      .csrf(ServerHttpSecurity.CsrfSpec::disable)
      .authorizeExchange(ex -> ex
          .pathMatchers("/public/**").permitAll()
          .anyExchange().authenticated())
      .httpBasic(Customizer.withDefaults())
      .build();
  }
}
2.3 กำหนด In-Memory User ชั่วคราว
@Bean
public MapReactiveUserDetailsService userDetailsService() {
  UserDetails user = User.withUsername("tester")
      .password("{noop}password")   // {noop} = ไม่เข้ารหัส (สำหรับ dev)
      .roles("USER")
      .build();
  return new MapReactiveUserDetailsService(user);
}
3. รวม CORS เข้ากับ Security
เมื่อใช้ @EnableWebFluxSecurity ต้องประกาศ ภายใต้ SecurityWebFilterChain ด้วย
return http
  .cors(corsSpec -> corsSpec.configurationSource(corsSource()))
  .csrf(ServerHttpSecurity.CsrfSpec::disable)
  .authorizeExchange(ex -> ex.anyExchange().permitAll())
  .build();
4. ตรวจสอบ Pre-flight Request
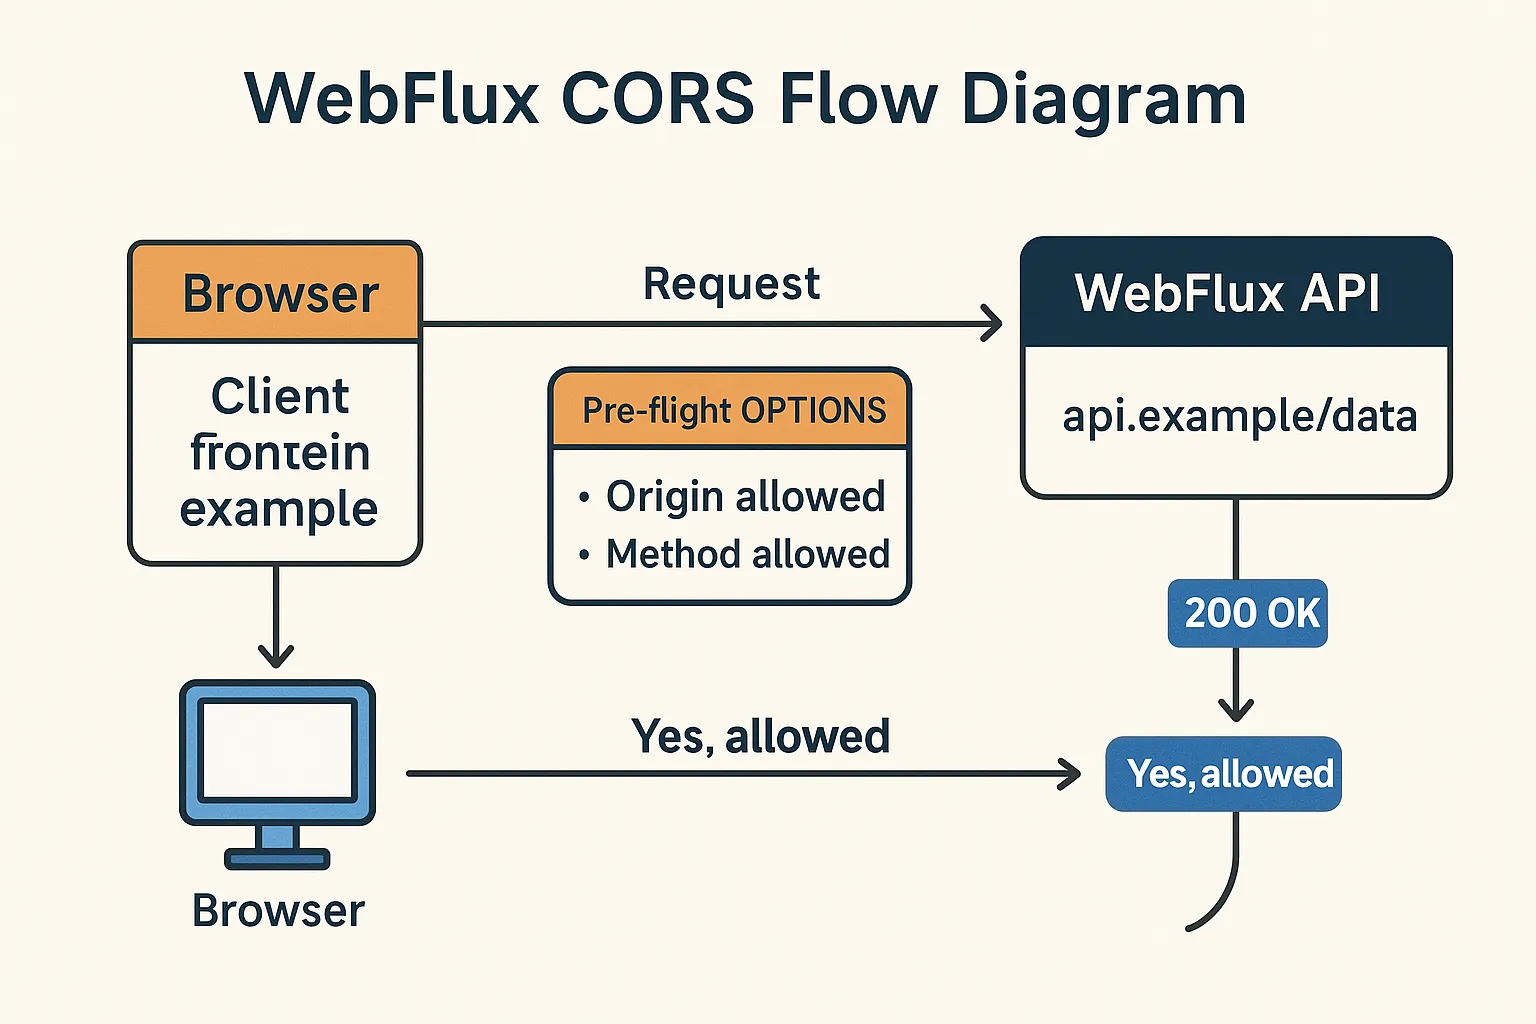
Browser จะส่ง OPTIONS ก่อน (pre-flight) WebFlux ต้องตอบ 200 OK และ Header ที่ถูกต้อง หากกำหนด CORS ไว้ถูกต้องจะผ่านทันที
4.1 ทดสอบด้วย cURL
curl -X OPTIONS "https://api.example.com/data" \
  -H "Origin: https://frontend.example.com" \
  -H "Access-Control-Request-Method: GET" \
  -I
5. ภาพประกอบ CORS Flow
6. เทคนิคเพิ่มความปลอดภัย
- ใช้ HTTPS เสมอ
- ตั้ง
maxAgeของ CORS ต่ำใน environment ที่อ่อนไหว - ปิด CSRF เฉพาะ API ที่จำเป็นเท่านั้น
- ใช้ Content-Security-Policy และ HTTP Security Header เช่น X-Frame-Options
สรุป
- กำหนด CORS ให้ Origin, Method, Header ชัดเจน
- ใช้ SecurityWebFilterChain เพื่อเปิด/ปิด endpoint
- ตรวจสอบ Pre-flight OPTIONS และทดสอบด้วย WebTestClient หรือ cURL
คำค้น SEO
webflux cors, spring webflux security, cors configuration webflux, securitywebfilterchain example, reactive security cors, spring boot enable cors webflux, cs rf disable webflux