บทความนี้จะพามาลองสร้าง ใช้งานและทำความเข้าใจการทำงานของ Gateway APIs โดยเราจะใช้ Spring Boot เป็น Framework ที่ใช้ในการสร้าง APIs service นี้ แถมด้วยการแนะนำ และอธิบายการใช้งานเบื้องต้นเกี่ยวกับ Mockoon เครื่องมือสำหรับทำ Mock data ทำหน้าที่เป็น Mock data APIs service
ทำความเข้าใจการทำงานของตัวอย่างโปรเจคของบทความนี้
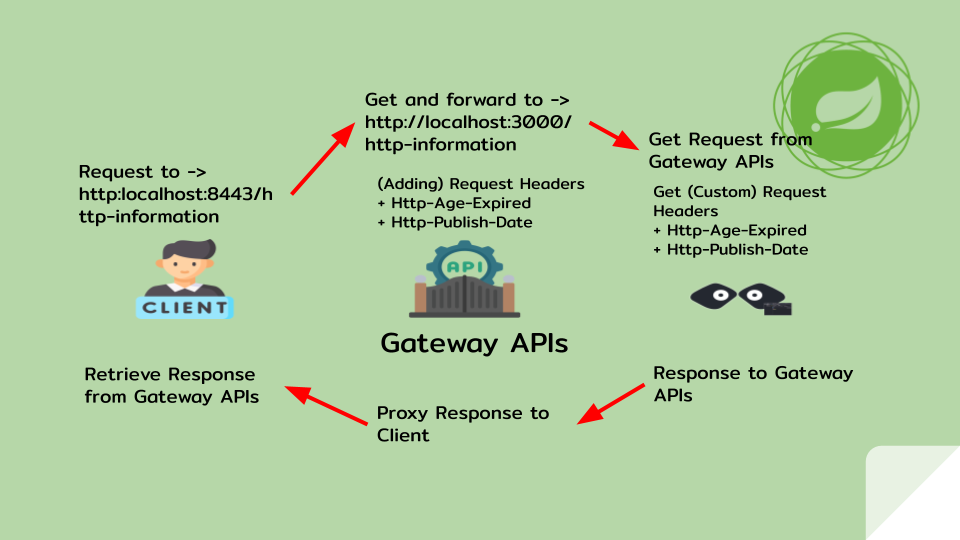
ขอใช้ภาพนี้เพื่ออธิบายการทำงานของเจ้าตัว Gateway APIs ของเรา
- (client): เริ่มต้น client ทำการร้องขอ (request) ข้อมูลไปที่ Gateway APIs ของเรา ด้วยการเรียกเข้าไปที่ http:localhost:8443/http-information
- (gateway): เมื่อ Gateway APIs ของเราได้รับการร้องขอ (request) จาก client จะทำบางอย่างกับการร้องขอ (request) นี้ โดยตัวอย่างจะทำการเพิ่ม headers ใหม่เข้าไปใน request จากตัวอย่างจะเป็น Http-age-expired, Http-publish-date จากนั้นทำการส่งต่อไปที่ server ปลายทาง ตามที่ gateway route ได้ทำการกำหนดค่าไว้ จากตัวอย่าง คือ http://localhost:3000/http-information นั้นเอง
- (mockoon): server ปลายทางที่ถูกจำลองสร้างไว้ด้วย Mockoon จะทำการรับข้อมูลคำร้อง (request) และทำงานบางอย่าง จากนั้นจะตอบกลับ (response) ไปหา Gateway APIs ของเราและ forword ต่อไปที่ Client จบการทำงาน
เริ่มโค๊ดกันเลย
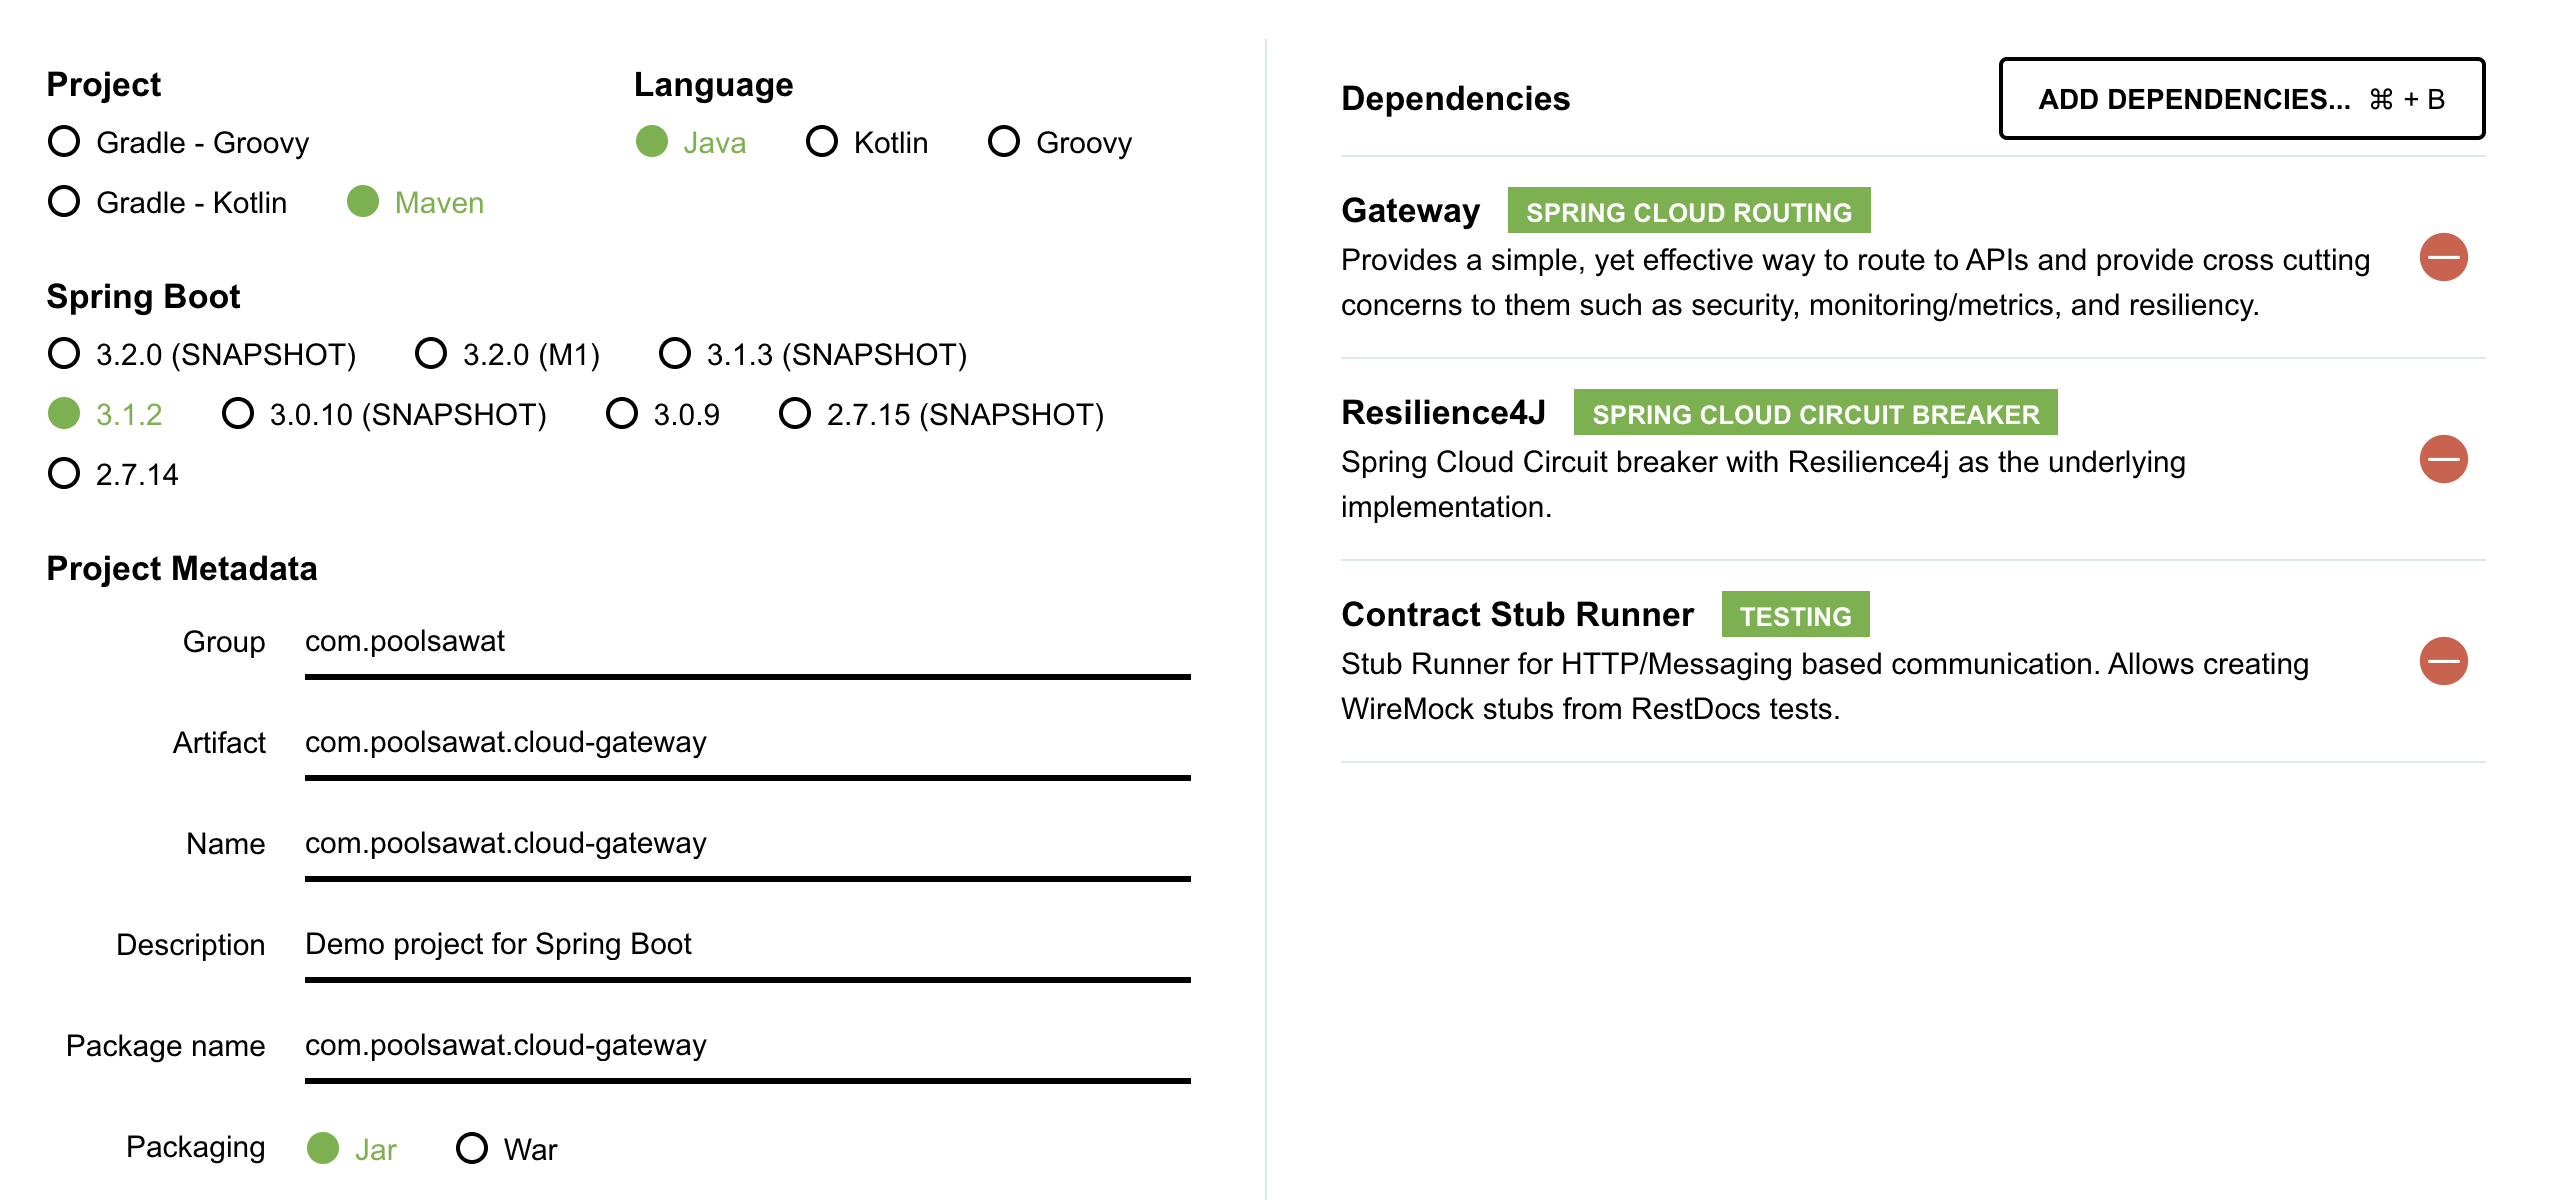
1. https://start.spring.io/
- Gateway
- Resilience4J
- Contract Stub Runner
2. เปิดโค๊ดที่ได้ เพิ่มโค๊ดตามนี้
– src/main/java/com/poolsawat/cloudgateway/configs/RouteLocatorConfiguration.java
package com.poolsawat.cloudgateway.configs;

import org.springframework.cloud.gateway.route.RouteLocator;
import org.springframework.cloud.gateway.route.builder.RouteLocatorBuilder;
import org.springframework.context.annotation.Bean;
import org.springframework.context.annotation.Configuration;

@Configuration
public class RouteLocatorConfiguration {

    @Bean
    public RouteLocator customRoutes(RouteLocatorBuilder builder) {
        return builder.routes()
                .route(p -> p
                        .path("/http-information")
                        .filters(f -> f
                                .addRequestHeader("Http-Age-Expired", "144000")
                                .addRequestHeader("Http-Publish-Date", "2023-08-24 12:00:00")
                        )
                        .uri("http://localhost:3000"))
                .build();
    }

}
– src/main/resources/application.properties
server.port=8443ใช้งาน Mockoon เบื้องต้น
– Mockoon ดาวน์โหลด ติดตั้งให้เรียบร้อย
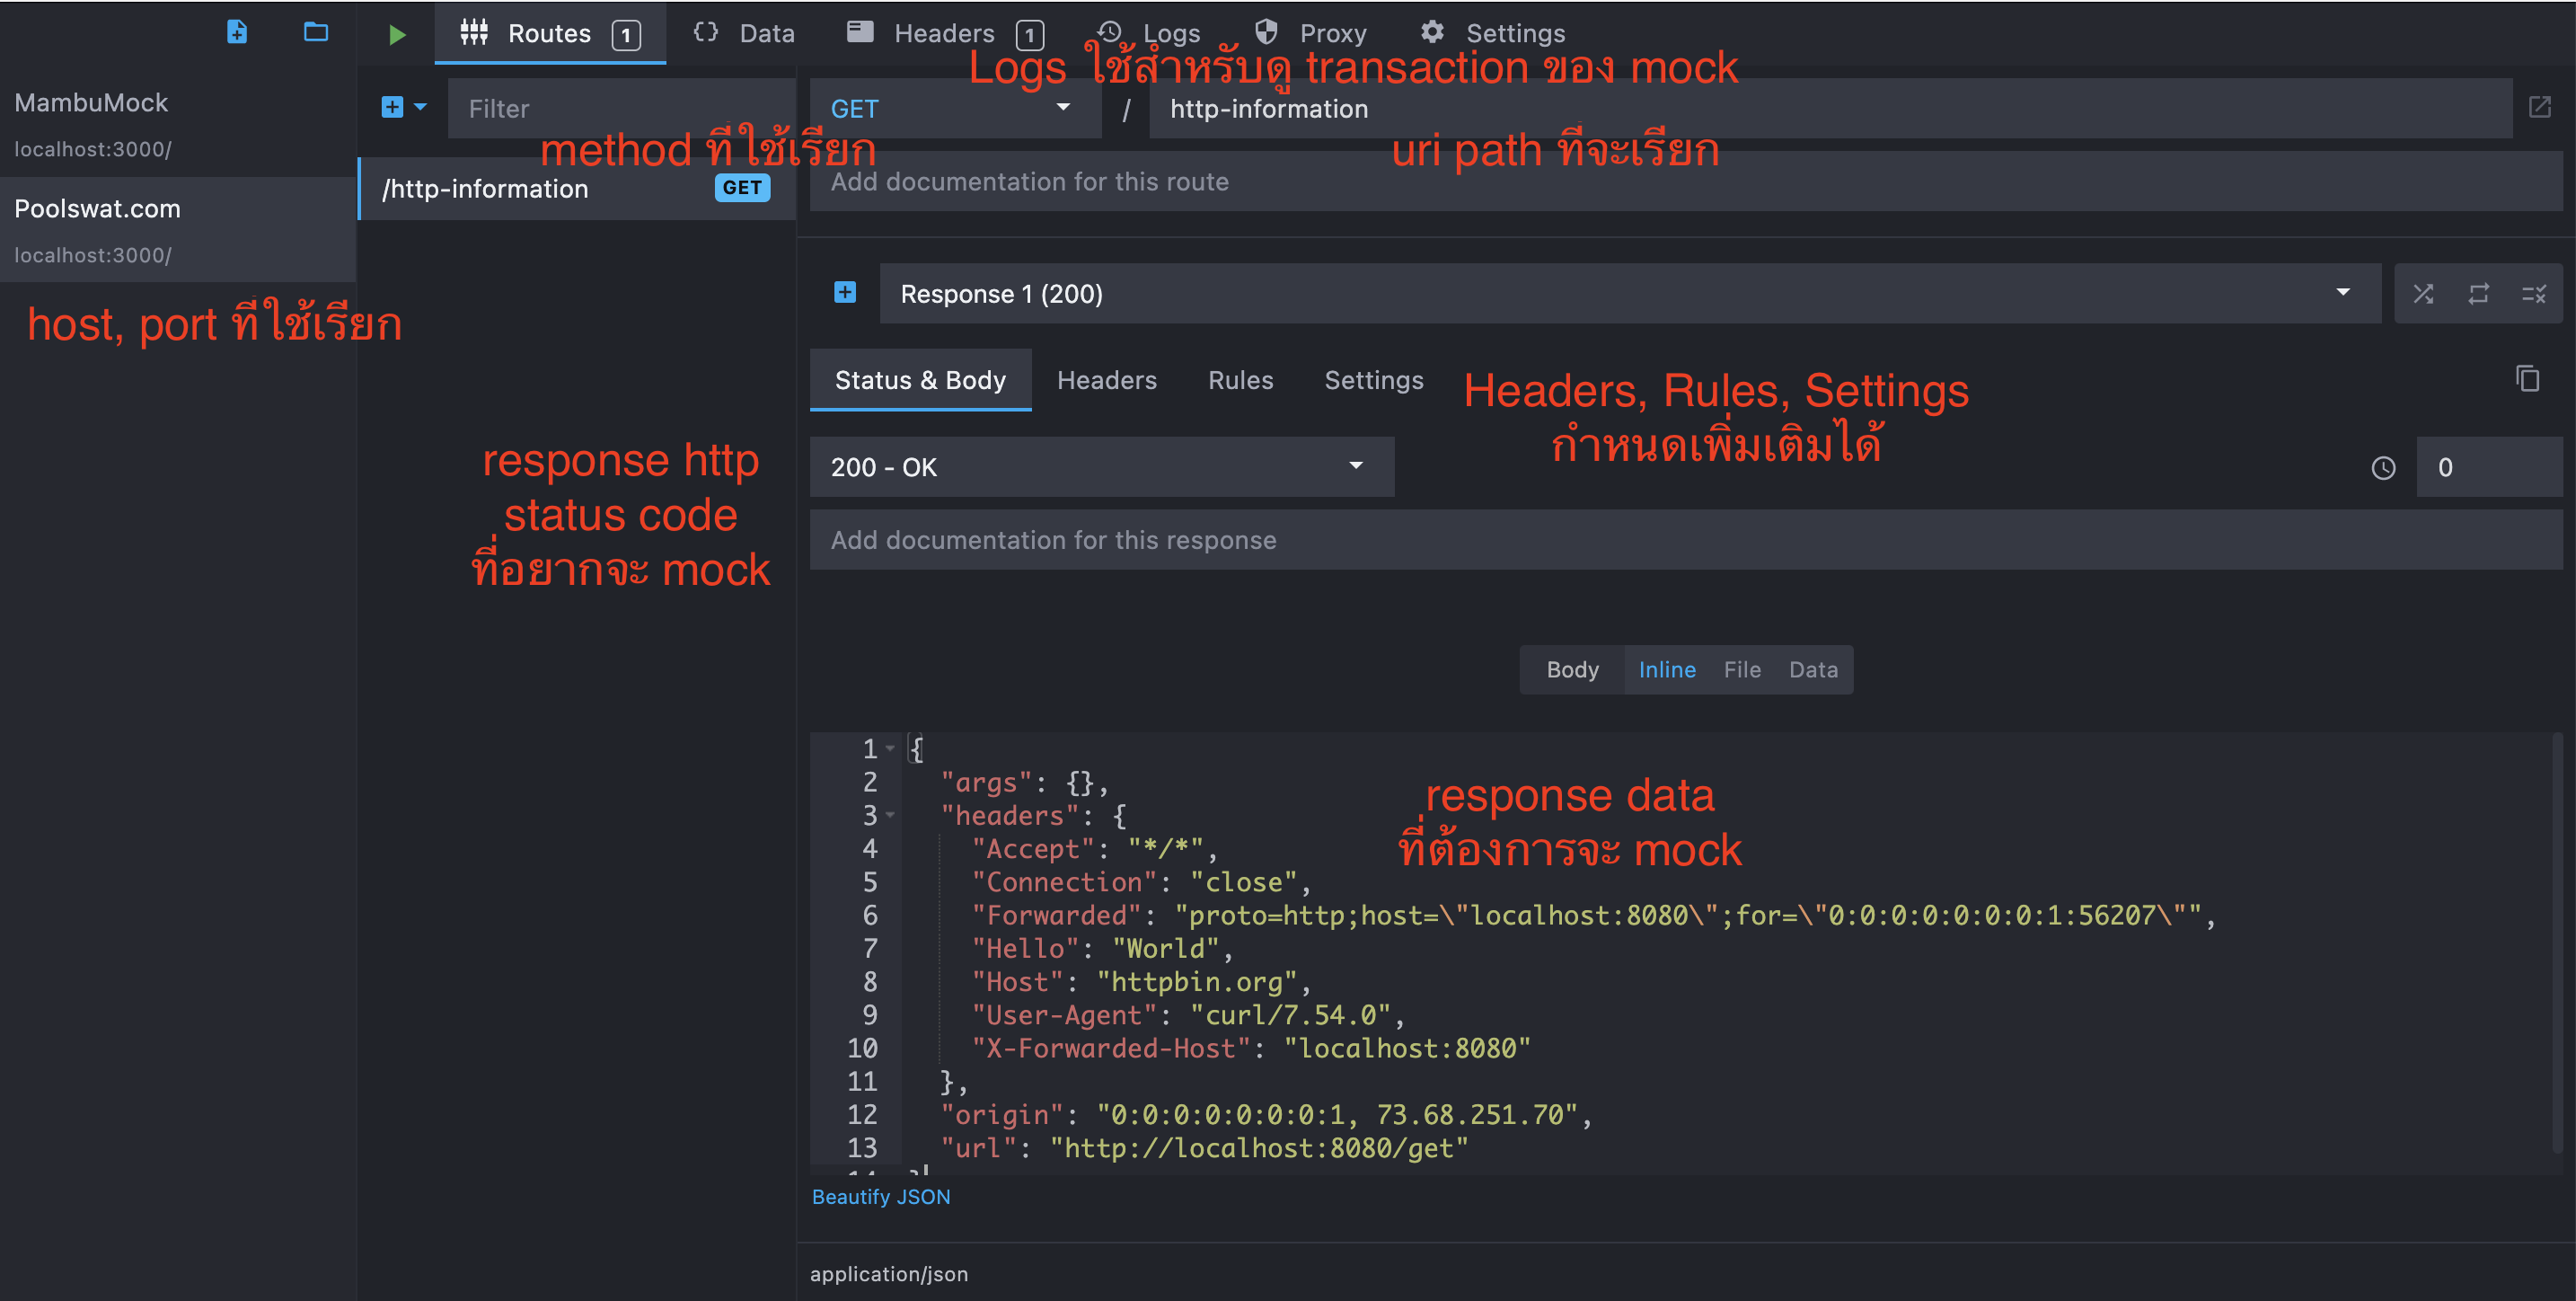
สร้าง Mock data api พร้อมแล้วก็ start mock server ได้เลย
$curl --silent --location 'localhost:3000/http-information'

-> {
  "args": {},
  "headers": {
    "Accept": "*/*",
    "Connection": "close",
    "Forwarded": "proto=http;host=\"localhost:8080\";for=\"0:0:0:0:0:0:0:1:56207\"",
    "Hello": "World",
    "Host": "httpbin.org",
    "User-Agent": "curl/7.54.0",
    "X-Forwarded-Host": "localhost:8080"
  },
  "origin": "0:0:0:0:0:0:0:1, 73.68.251.70",
  "url": "http://localhost:8080/get"
}
ทดสอบเรียก Gateway
curl --silent --location 'http://localhost:8443/http-information'

-> {
  "args": {},
  "headers": {
    "Accept": "*/*",
    "Connection": "close",
    "Forwarded": "proto=http;host=\"localhost:8080\";for=\"0:0:0:0:0:0:0:1:56207\"",
    "Hello": "World",
    "Host": "httpbin.org",
    "User-Agent": "curl/7.54.0",
    "X-Forwarded-Host": "localhost:8080"
  },
  "origin": "0:0:0:0:0:0:0:1, 73.68.251.70",
  "url": "http://localhost:8080/get"
}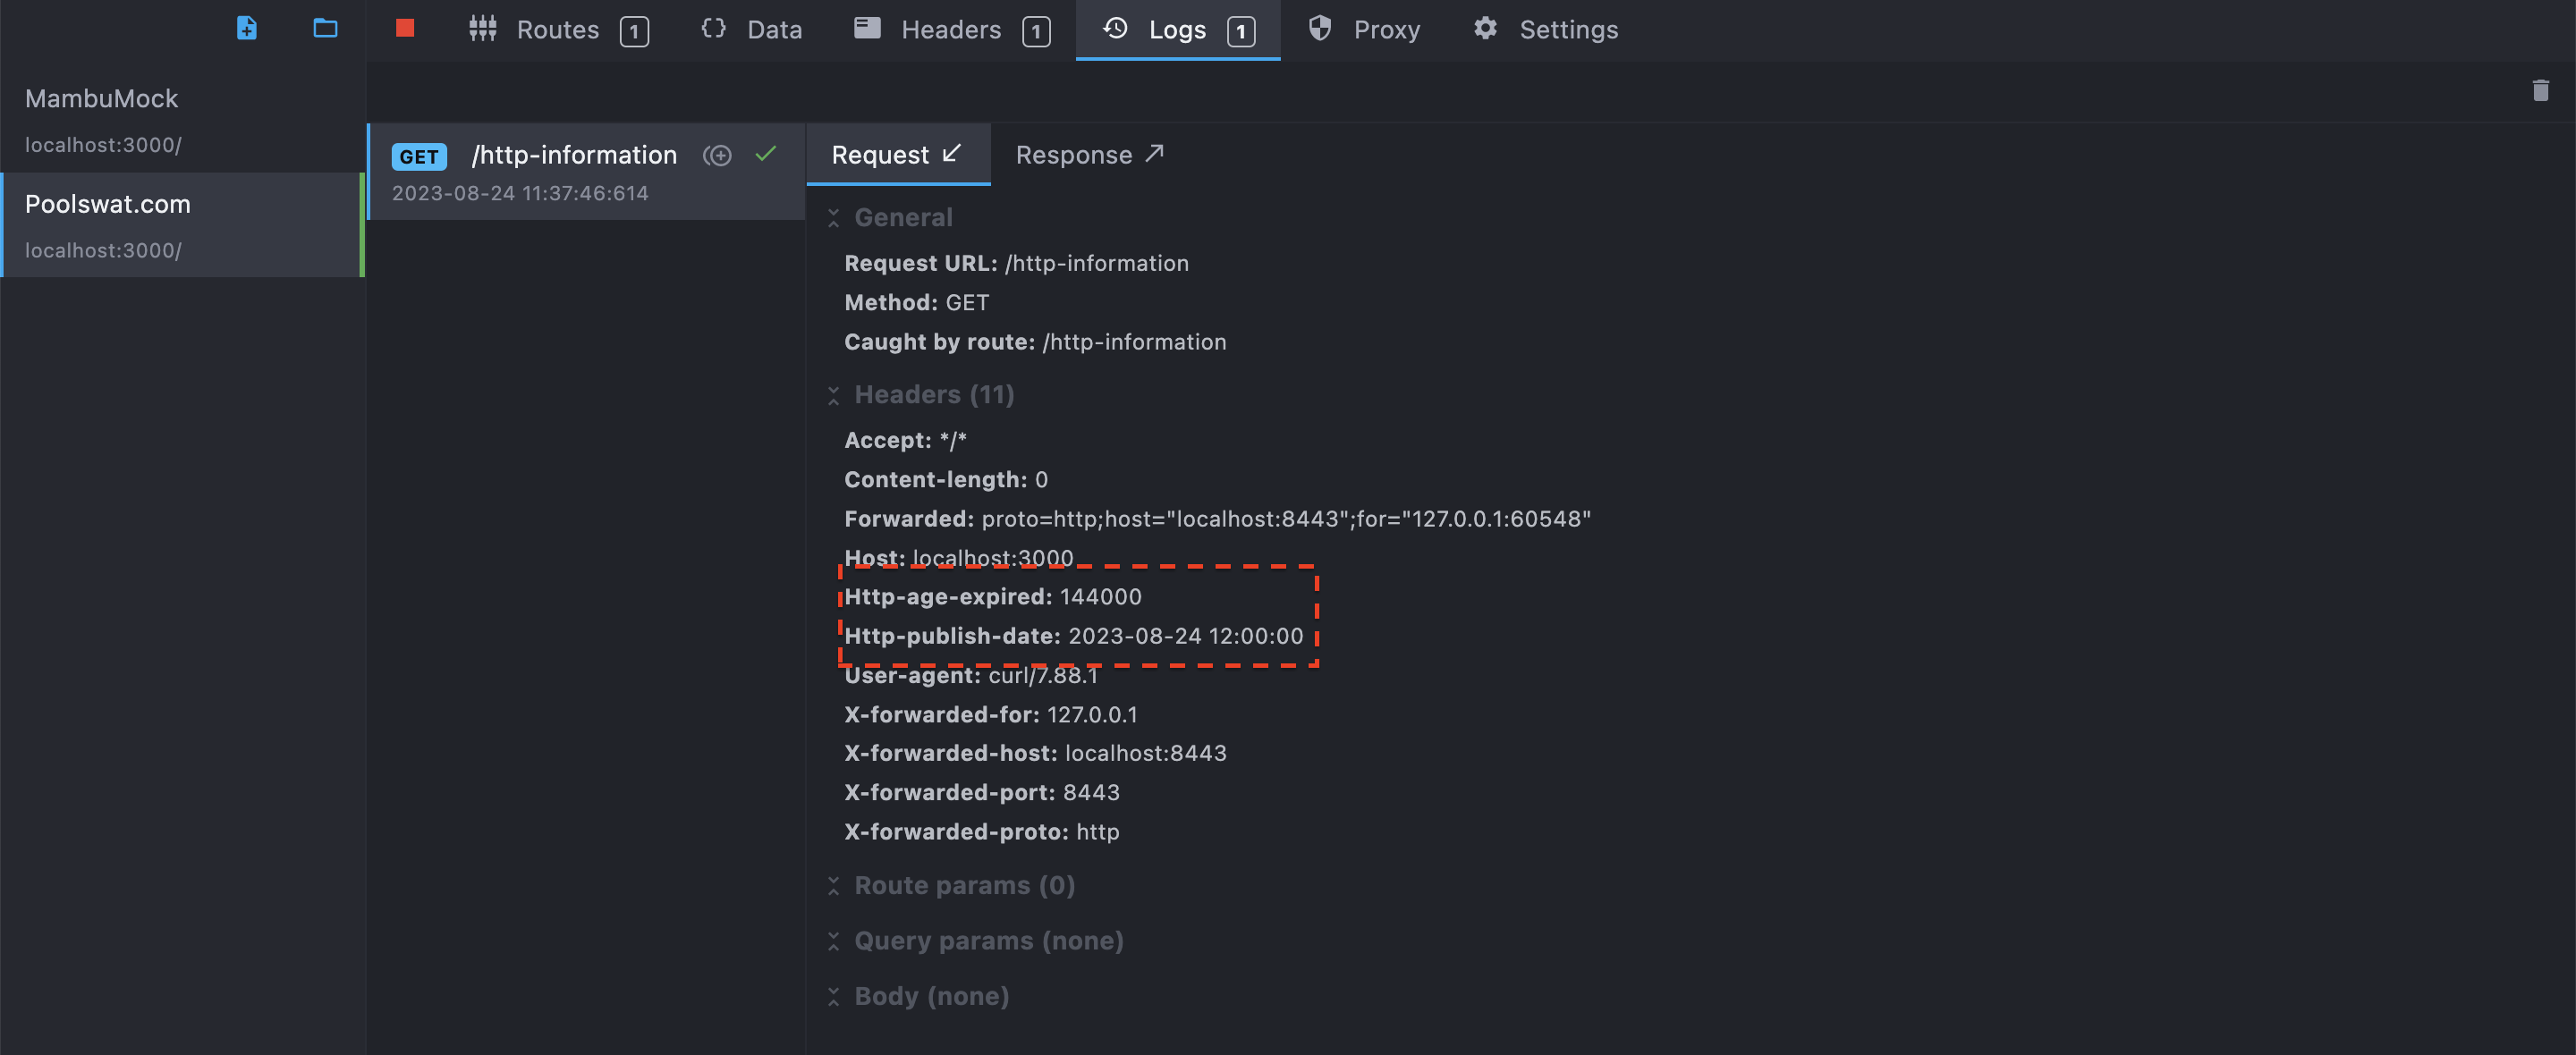
กลับไปที่ Mockoon เปิดดู Logs จะพบว่ามี request เขามา headers มี custom header 2 keys ใหม่เข้ามา
สรุปท้ายบทความ
สำหรับการสร้าง Gateway ใน Spring Cloud Gateway ค่อนข้างง่าย แบบเริ่มต้น โค๊ดไม่ได้มีความซับซ้อนอะไร บทความต่อไป จะเอาเทคนิคอะไรมาแชร์ รอติดตามกันด้วยนะครับ